Wednesday, October 25, 2017

That Big Ole Fireplace

Now that school is back and our schedules are a little more crazy, we have pushed pause on house projects. If you know me - its driving me CRAZY! 

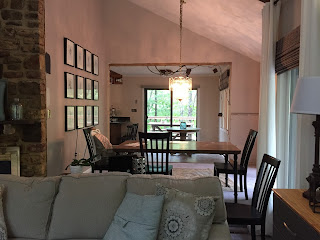
Almost every night I find myself staring at our huge stone fireplace; not really feeling it! 
I keep going back and forth between gray/white washing it and just framing it out to cover all the stone. 


Inspiration pictures.. 


http://erin-artandgardens.blogspot.com/2015/05/chalk-painted-1970s-stone-fireplace.html


I think I've settled with gray washing first and then if I hate it I can just cover it up and frame it out. Jared will be so excited! (NOT!) :)

Now to find the time to do so.. 


Tuesday, August 22, 2017

What do we have here...

Summer is the best time for yard work, right? When we moved in we knew we had a TON of yard work to do. The house had not only been sitting for about two years but the couple who owned it had let the yard go long before that.  We only have about 500 trees so you know no big deal. We have enough sticks, not to mention huge branches, in the yard to keep us busy for years! 
One afternoon we decided we should at least clean up the front beds and make them look decent. What we thought would be just a couple hours turned into all afternoon into the evening project. :)


After:


Thursday, August 10, 2017

That Big ole wall!

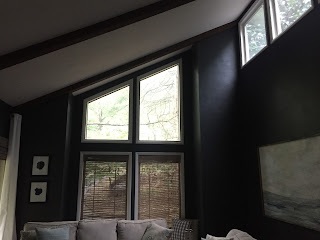
After changing my mind about a hundred times- pretty normal, just ask Jared- I finally decided on a color scheme for the living room. First up - paint the walls. Well one problem...one of the walls in the living room is 20feet tall!! So we decided to see how much it would cost to have someone else paint the living room. Well that was a bust! Hiring painters is SO expensive. At least for our living room is was! 
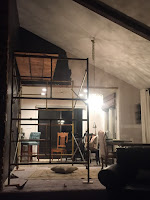
Plan B- I paint the living room. We asked my dad if we could borrow his extension ladder. Of course he asked why and said he wasn't comfortable with me on the ladder for so long and having to reaching up that high. He had a friend who owns some scaffolding so he lined it up and brought it over! Gees that stuff is big!
Before the scaffolding came I painted as much as I could all around the room. It looked pretty crazy in there. 

Notice the color is super similar to the basement bedroom. This color - Wrought Iron BM- though has more gray in it whereas the basement color has more blue


Scaffolding Part One:


Part Two:


Part Three:


Then I used the extension ladder for these areas


YAY! Finally done... well for the most part ;)


Tuesday, August 8, 2017

Goodbye Wall!

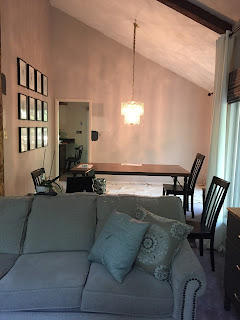
After taking down the cabinets in the kitchen Jared was in demo mode. We decided, even though we don't have the money in the budget for new floors, to take the wall down between the kitchen and dining room. I mean as long as its clean and sanded whats the big deal with having subfloor showing for a while... months.. maybe a year ;)

This was one of those walls that just didn't make sense. It chopped up the flow of the house and really had no purpose. We aren't very traditional people so not having a eat in kitchen and separate dining room really didn't bother us. 

We had a few friends who do contract work come over and help us determine if the wall was load bearing or not. The consensus was- NOT! YAY!! 

TAKE THAT SUCKER DOWN!

Note: I realized about a fourth of the way through I was removing wall paper off a wall that we were going to take down! What was I thinking!? Don't do more work than necessary! 


My dad came over to help Jared.  Zayden loved watching and kept asking to help, so we let him give a couple swings and then help pull the wall board off. :)


SO MUCH BETTER! And so much more light! 


Monday, August 7, 2017

First Impressions


This project took quite some time, let me tell ya! I originally really wanted to wallpaper the foyer. I wanted to add crown molding, chair rail and then wallpaper. Well the wallpaper I wanted was just way out of our budget. So I decided to make stencils of the pattern I wanted and to hand paint the walls to look like wallpaper. I did something similar in our old house but this pattern was way more intense and was going to take way longer than last time :) 

I printed the pattern on card stock and then cut them out and taped them together to be my stencil. 
The wallpaper had three different shapes as seen below. 


Here is a picture of a section of the wall after I had drawn the stencils on the wall

After I drew all over the walls - my four year old didn't quite understand why mommy was allowed to draw on the walls and he was not :) - 
it was time to start painting. I got my little paint brush out and started filling in all the shapes. 


During the painting process we went ahead and put up the chair railing and crown molding. I'm pretty sure Jared will never volunteer to do crown molding again. 
So I will wait a while before telling him I really want crown molding in all the bedrooms and kitchen!


Finally after months of painting here and there while the kids napped or in the evenings while Jared worked on other things I finally finished! I LOVE how it turned out. Im not a huge fan of the tile in the foyer with the pattern on the walls but it will have to do until we can save up enough to redo the floors. 

Side Note: I did paint the ceiling the same color as the living room... well I don't love it. Don't get me wrong I love it just looking at the foyer but not next to the living room... so that will change eventually. 
I'll admit.. I've just been lazy about getting up there and painting it a different color. Someday...


Paint colors used:

Walls - Dove White Valspar
Stencil- Revere Pewter BM
Ceiling - Wrought Iron BM
All trim and molding is pure white by Valspar


Saturday, August 5, 2017

Guest Bedroom/Office

I guess I lied.. we hadn't painted ALL the bedrooms yet. I still needed to paint the guest room/office in the basement. I wanted to go a little moody.... so Gravel Gray it was. Little did I know that soon after painting this room I would fall in love with a similar color for the living room! 

The room isn't complete as far as decor and arrangement but it IS painted. Check! 


Beige, ivory, tan whatever you want to call it... three of the four bedrooms were this ivory color. Walls AND trim= ivory. BLAH! So boring and old looking!


 When we were moving in we knew we were going to paint this room soon so we just threw everything that went in the room in the middle of the room! HOLY MESS! 


Let's get painting... first comes white trim then dark moody blue walls

We have a great storage area in the basement so we really didn't need the two closets in this room to be used as closets. We decided to take the doors off one, paint it, and use it as the "office area". We put the desk in there which helps keep the room from being too crowded. 


Friday, August 4, 2017

We can see!!

One of the first projects we both agreed on that needed to happen ASAP in the house was to take down the hanging kitchen cabinets above the peninsula. They first blocked your view into the eat in area and second they really blocked a lot of sunlight that could be coming in from the sliding doors. 

Before starting on the cabinets I couldn't take the wallpaper any longer. It just had to go! 
Talk about a hard job. This wallpaper was sooo stubborn and took at least three different methods to take off. It felt like forever but I finally got the job done! 


My cute little helper! 


SO MUCH BETTER! 


Now for those cabinets! WOW those suckers were really in there! I think the soffits were earthquake proof! Jared had to use a sledge hammer to break them apart but even that took a TON of work. He would hit the wood with everything he had and nothing would move! Craziness! 
No worries though.. we finally got them all down and it looked AMAZING!!!!

 Bye Bye! 


 Almost there!


YAY!!!